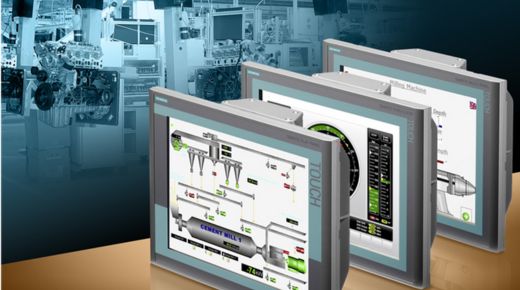
In today’s automated world, PLC HMI control panels play a crucial role in managing industrial processes. They provide operators with an interface to monitor and control machinery efficiently. In this blog, we’ll discuss the essential steps for installing and setting up these panels.
What is a PLC HMI Control Panel?
A PLC HMI control panel combines two vital components: the Programmable Logic Controller (PLC) and the Human-Machine Interface (HMI). The PLC is responsible for automating processes, while the HMI allows users to interact with the system. Together, they improve productivity and ensure smooth operation in industries such as manufacturing, energy, and transportation.
Step 1: Planning the Installation
Before you begin, it’s essential to plan your installation. Consider the following:
- Location: Choose a suitable location for the control panel. It should be easily accessible and away from extreme conditions, such as moisture or excessive heat.
- Electrical Requirements: Check the electrical specifications for the PLC and HMI. Ensure that the power supply meets the required voltage and current ratings.
- Network Configuration: Determine how the PLC will connect to other devices in your system. This may include sensors, actuators, and other control panels.
Step 2: Gathering Tools and Materials
You will need several tools and materials for the installation:
- Screwdrivers
- Wire cutters and strippers
- Multimeter
- Mounting hardware
- PLC and HMI units
- Wiring
Step 3: Installing the Control Panel
- Mount the Panel: Secure the control panel to the wall or a mounting frame. Make sure it’s level and firmly attached.
- Wiring: Connect the power supply to the PLC and HMI. Follow the manufacturer’s wiring diagrams to ensure correct connections. Use wire cutters and strippers to prepare the wires before connecting them.
- Grounding: Properly ground the control panel to prevent electrical interference and ensure safety.
Step 4: Setting Up the HMI
- Power On: After wiring, turn on the power supply. The HMI should boot up and display its interface.
- Configuration: Use the HMI software to configure settings. This may include setting up communication protocols, defining inputs and outputs, and creating control screens.
- Testing: Once configured, test the HMI by simulating different operations. Ensure that it correctly displays data and responds to commands.
Step 5: Programming the PLC
- Programming Software: Install the PLC programming software on your computer. Connect the computer to the PLC using the appropriate cable.
- Write the Program: Create a program that defines how the PLC will control the connected devices. This includes setting up logic for inputs and outputs.
- Download the Program: Once the program is complete, download it to the PLC. Make sure to test the program to ensure it works as intended.
Step 6: Final Testing
After installation and programming, conduct a thorough test of the entire system. Check all connections, run through different scenarios, and ensure everything operates smoothly. Make any necessary adjustments to the programming or configuration.
Conclusion
Installing and setting up PLC HMI control panels can seem daunting, but with careful planning and attention to detail, it can be a straightforward process. Following these steps will help you create a reliable control system that enhances efficiency and productivity in your industrial operations. Remember to refer to manufacturer guidelines and safety standards throughout the installation process.
Happy controlling!


